Subitem Table
Create tables with your subitems on your reports.
Working with subitem tables
Use the instruction from this article to create a base for your customizations, a Microsoft Word (docx) template from scratch or use one of our free templates as a starting point.
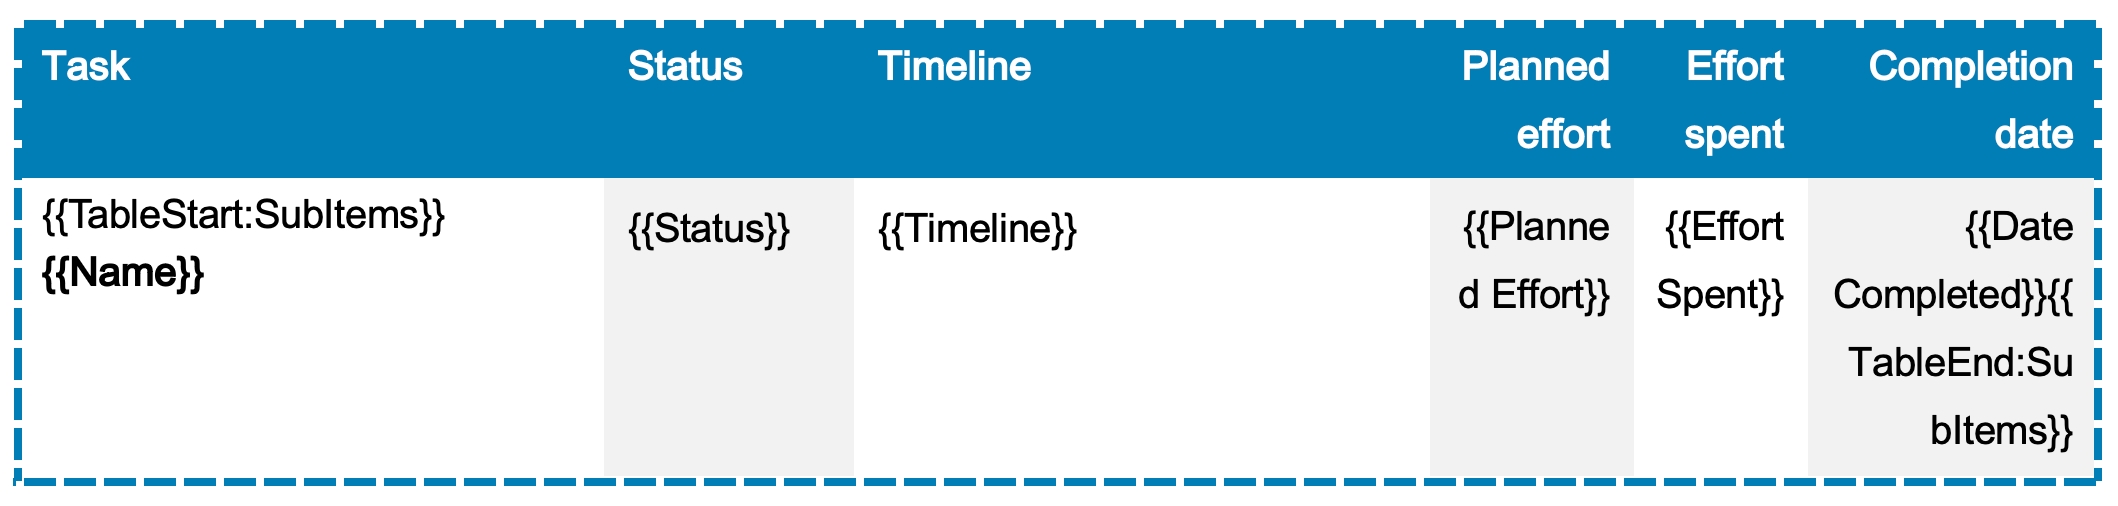
This is an example of how the structure looks like:
Create a table from scratch
Insert a table in Microsoft Word. Usually, you only need two rows: one for the headings and one for the placeholders.
The second row (left column) needs to start with the placeholder {{TableStart:SubItems}} and ends (right column) with {{TableEnd:SubItems}}
The second row will automatically replicate itself by the numbers of subitems in the exported PDF.
In between, insert the placeholders you want to use in your final report. The logic of the placeholder is: {{ColumnTitle}}
If your subitem column is named 'Due Date', the placeholder would be {{Due Date}} and so on.
The name of the subitem is always {{Name}}
Subitem Summary
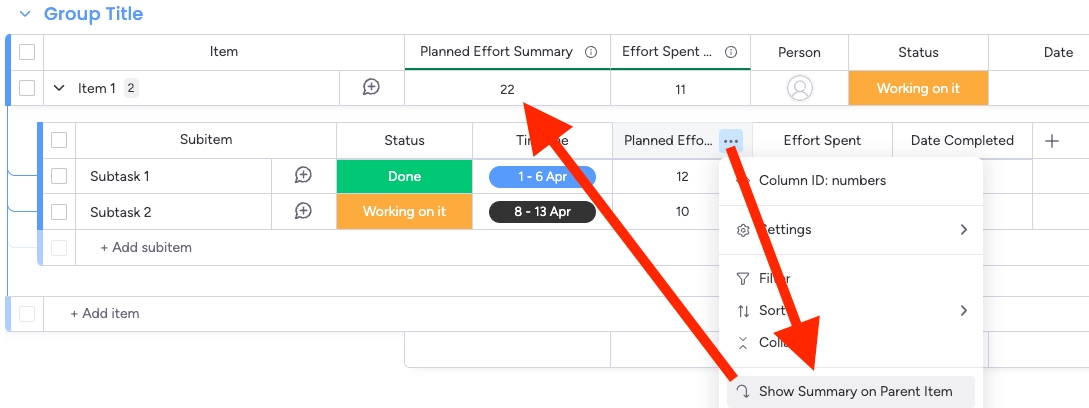
If you want to include the summary of subitems in your table (e.g. total number of hours), please use the native monday.com feature 'Show summary on parent item':
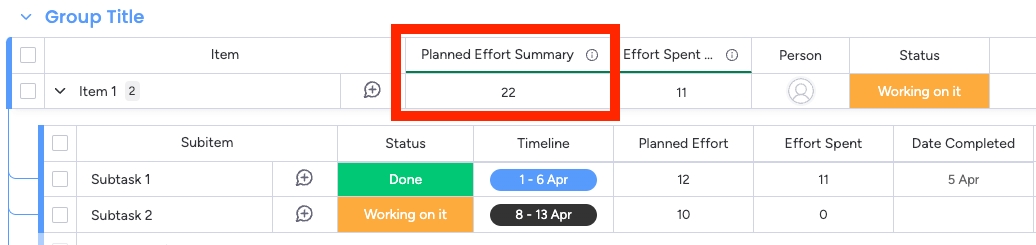
You can now use the column name from the parent item. In our example, we renamed it to 'Planned Effort Summary':
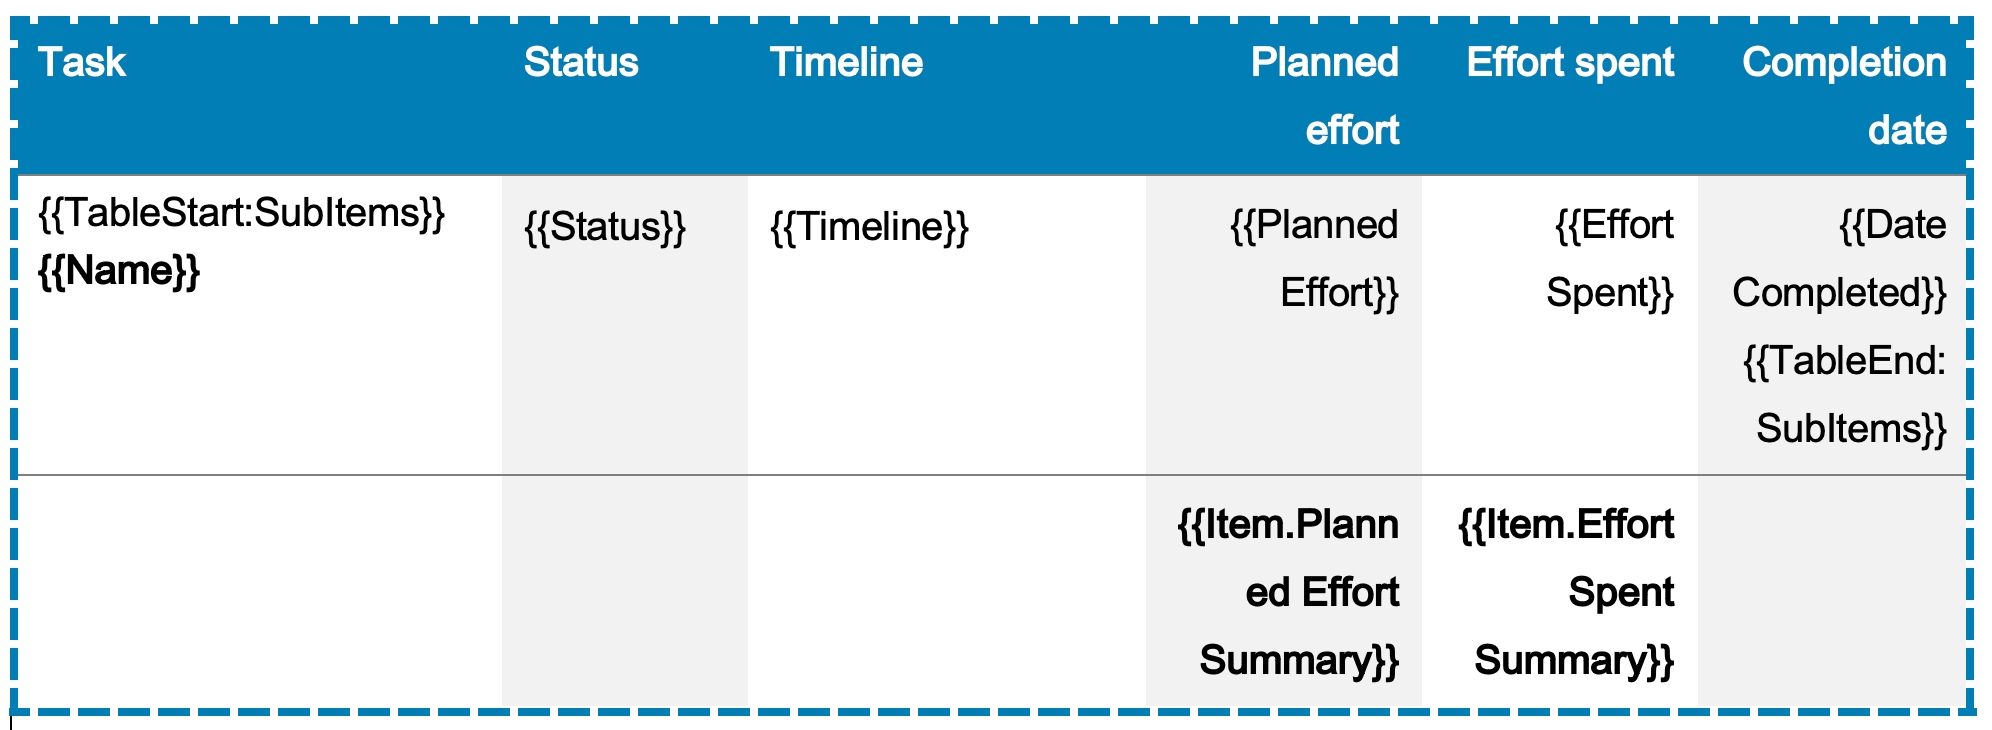
The placeholder is now in the item level and therefore, the structure is {{Item.ColumnTitle}}, in our case {{Item.Planned Effort Summary}} (please make sure to add the prefix Item. before the column title).
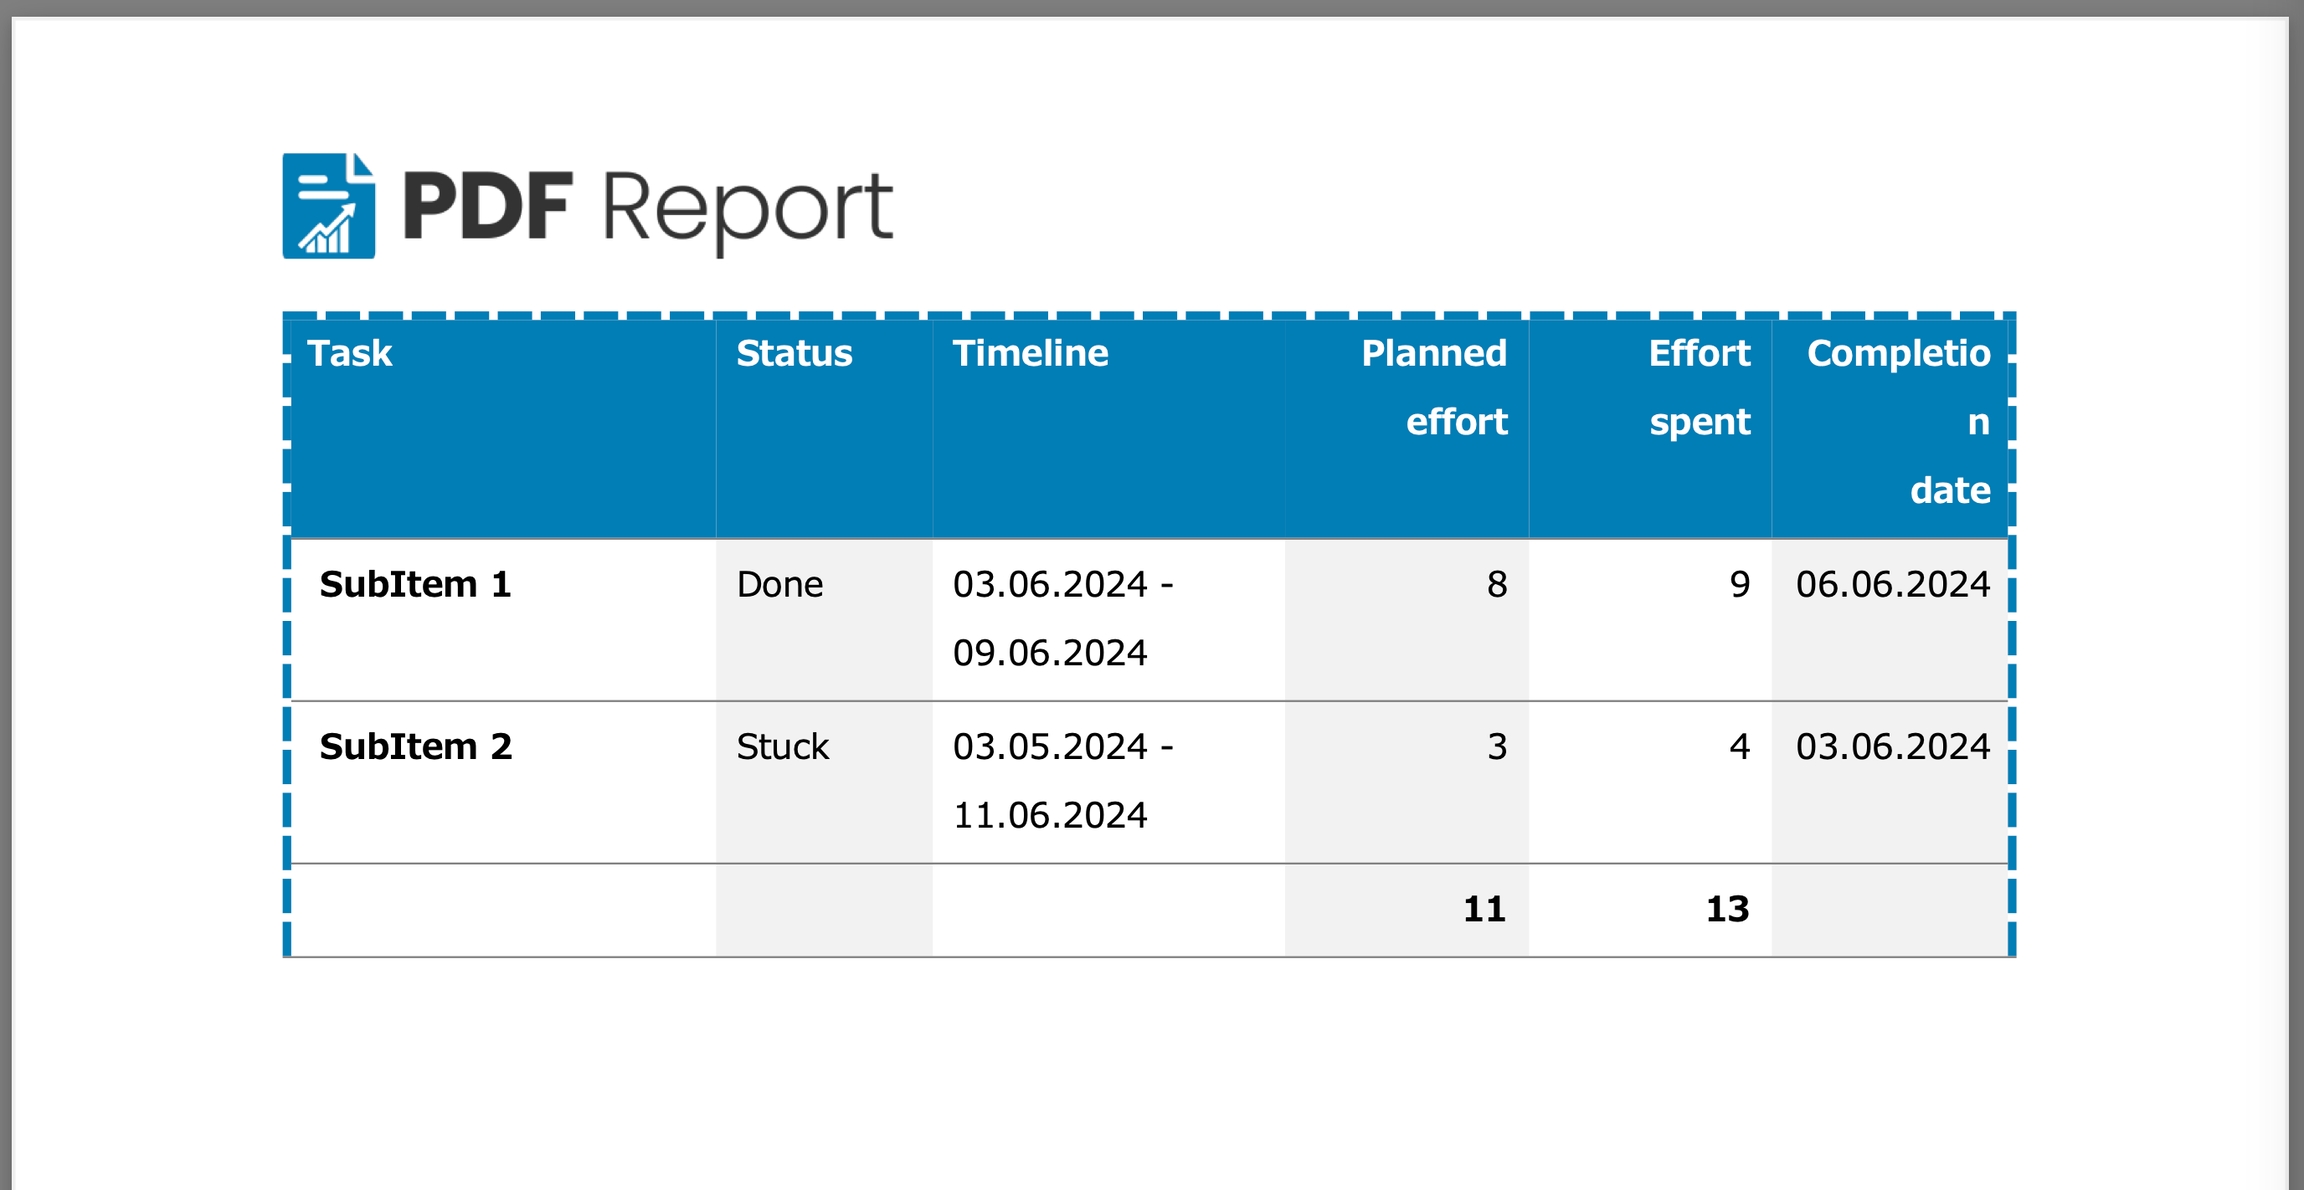
You can now insert this placeholder in a third row in your table:
The table on your final PDF report would look like this:
Combine Item and Subitem Table
You can also combine the subitem table with item-level placeholders in one document and create more complex project reports.

Download the template from this example from our free Template Gallery.
To use both tables within a document, it is important to nest the Subitem table loop inside the Item table loop.
This means that the placeholders {{TableStart:Items}} and {{TableEnd:Items}} should surround the entire Subitem table, which is generated between the placeholders {{TableStart:SubItems}} and {{TableEnd:SubItems}}.

Follow these steps to properly insert both the Item and Subitem tables into your document:
1. Start the Item Loop
Insert the {{TableStart:Items}} placeholder where you want the list of Items to begin and insert your item table.
2. Nest the Subitem Loop Inside
Immediately after the item table, insert the {{TableStart:SubItems}} placeholder to start the Subitem loop.
Add your Subitem fields here.
Then close the Subitem loop with {{TableEnd:SubItems}}.
Important: The entire Subitem Table must be inside the Item loop!
3. End the Item Loop
Place the {{TableEnd:Items}} placeholder to finish the Item loop.
4. Add Grouping (Optional)
If you want the output to be grouped the same way as it appears in your board:
Place the grouping placeholder
{{TableStart:Groups}before{{TableStart:Items}}Close the grouping
{{TableEnd:Groups}}after{{TableEnd:Items}}
Last updated